Table of Contents
Installation
- Download and unzip the latest release zip file.
- Using WordPress plugin uploader, upload GOT WP Login Register plugin zip file to your WordPress site OR upload the entire plugin directory ‘got-wp-login-register’ to the ‘/wp-content/plugins/’ directory.
- Activate the plugin through the ‘Plugins’ menu in WordPress administration panel.
- You will get an alert to install Dilaz Panel options framework plugin; Install and activate it.
- Go to GOT WP LR Panel options page.
- Add your Google Client Id and configure other settings.
Setup Google API
1. Go to the Google API Console.
2. Select an existing project, or create a new one by selecting CREATE PROJECT.

3. Enter project name and click the Create button.

4. In the Google API Library page, enter people in the search box.

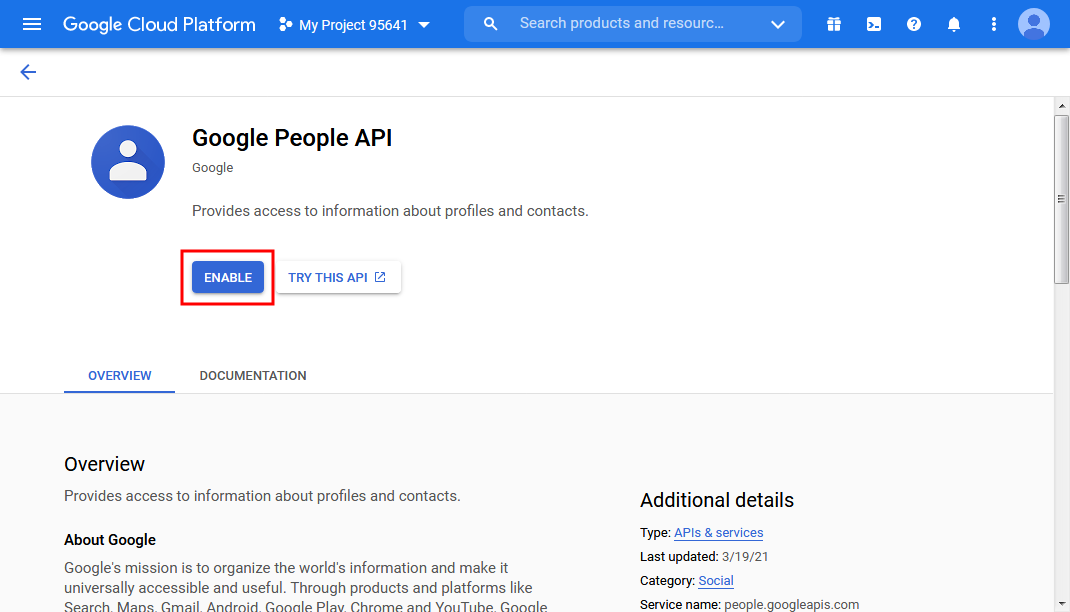
5. Select Google People API and proceed.

6. From the Google People API page click on the Enable button.
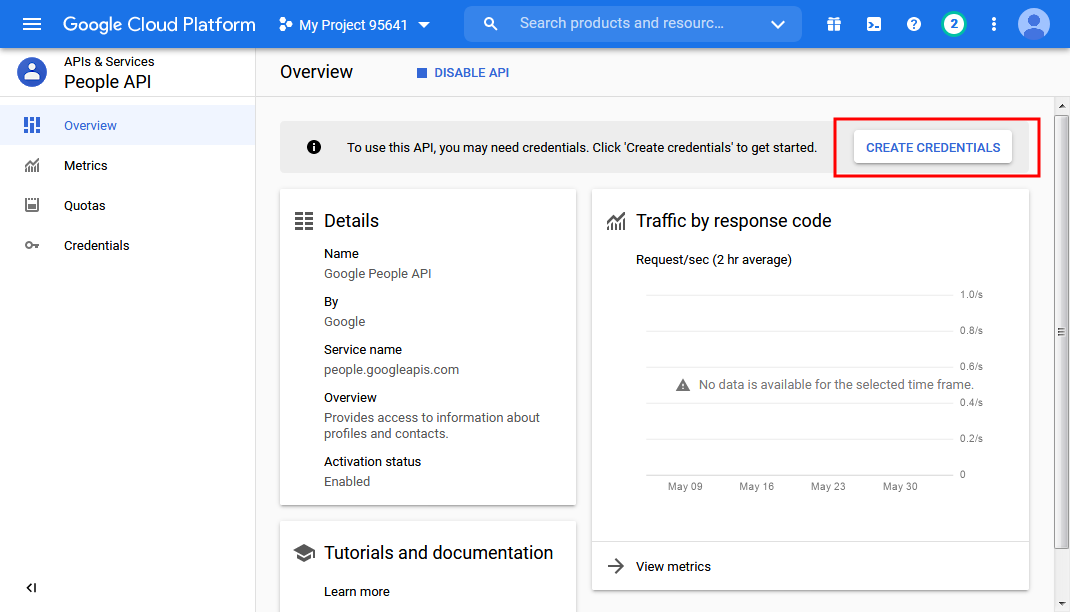
7. From the API & Services page, click on the CREATE CREDENTIALS button.
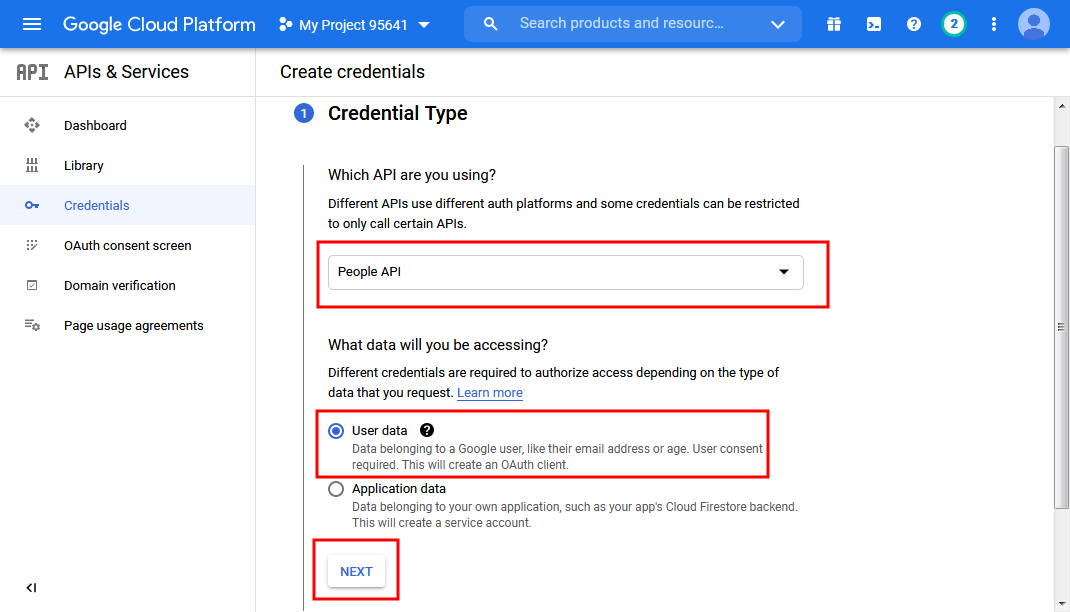
8. From the Credentials tab, select People API, User data and click the NEXT button.
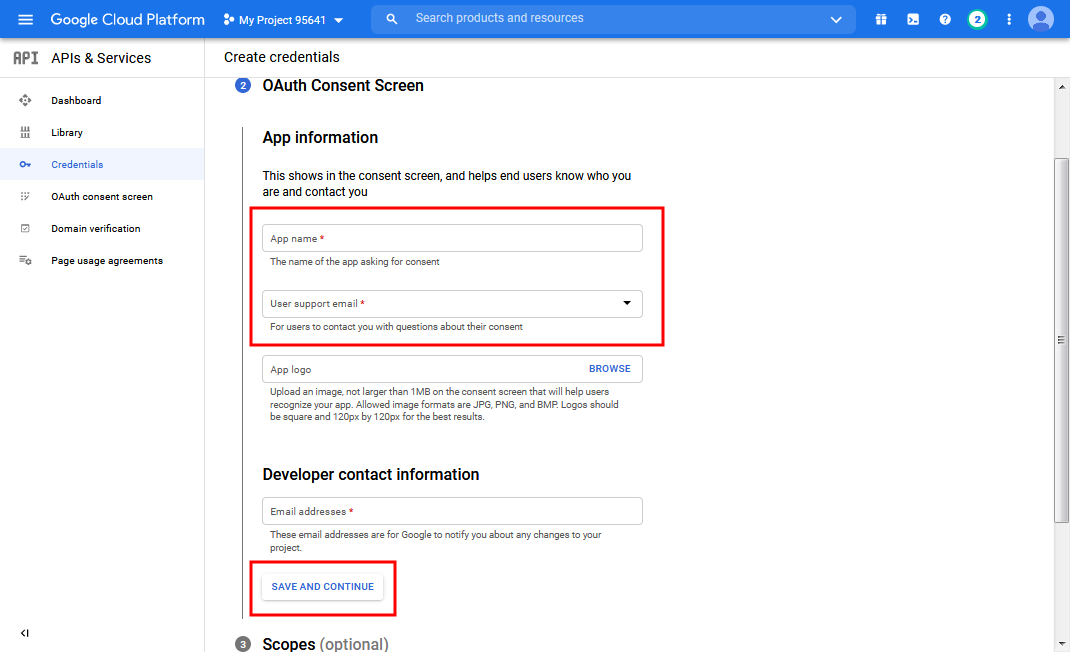
9. From the OAuth Consent Screen tab, select App information and click the SAVE AND CONTINUE button.
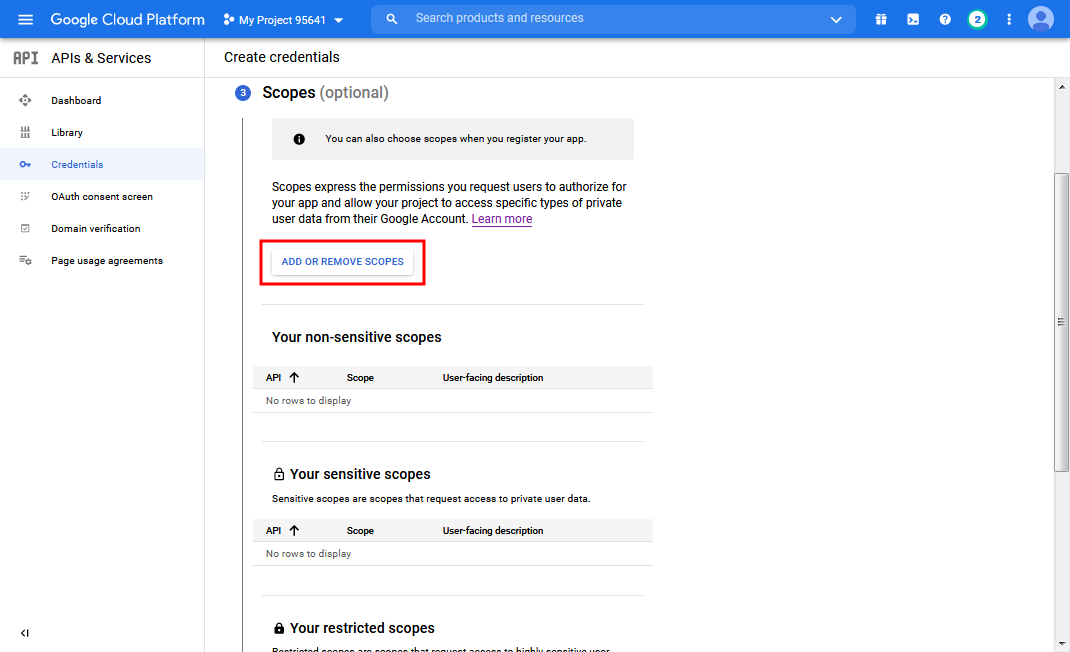
10. From the Scopes tab, click on the ADD OR REMOVE SCOPES button.
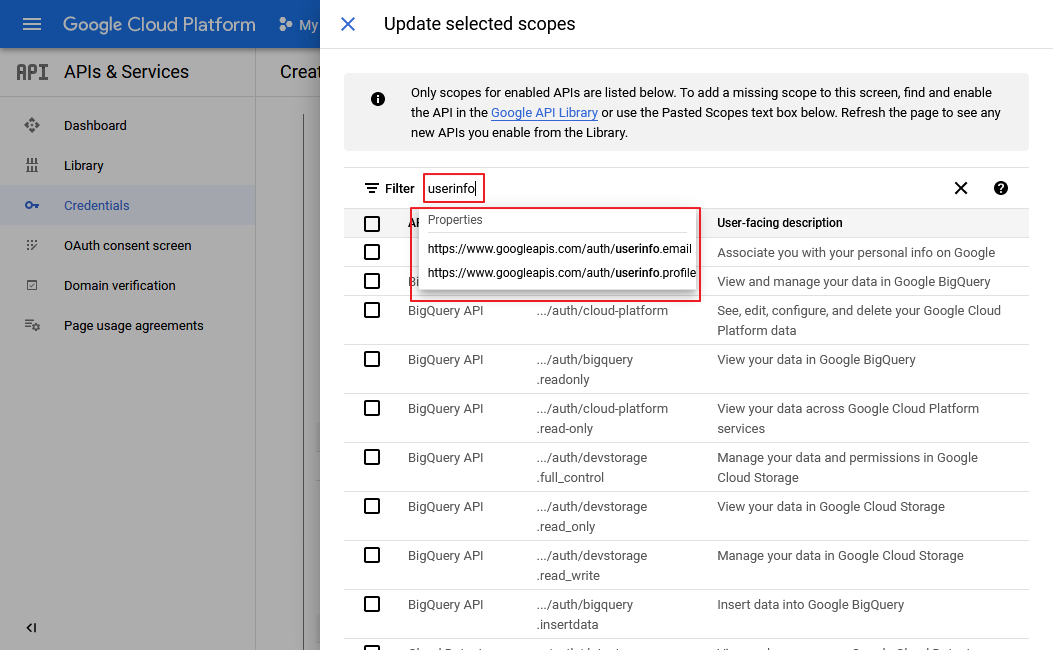
11. From the Update selected scopes popup, enter userinfo in the filter search field and select the userinfo properties provided.
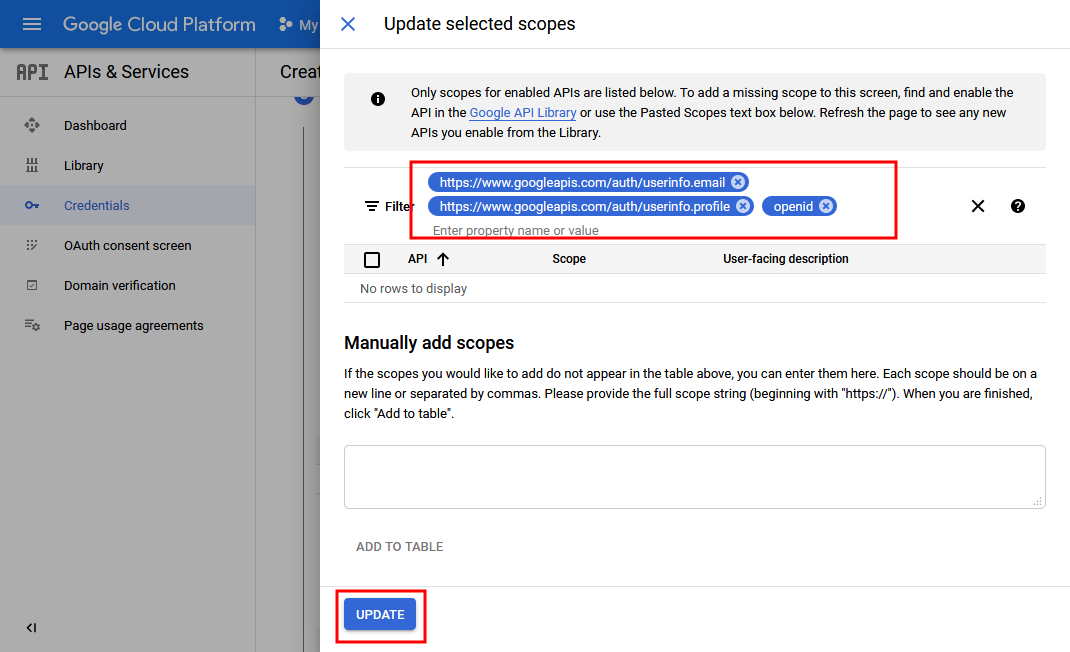
12. From the Update selected scopes popup, enter openid in the filter search field and select the openid properties provided.

13. After adding all the preferred scopes, click on the UPDATE button.
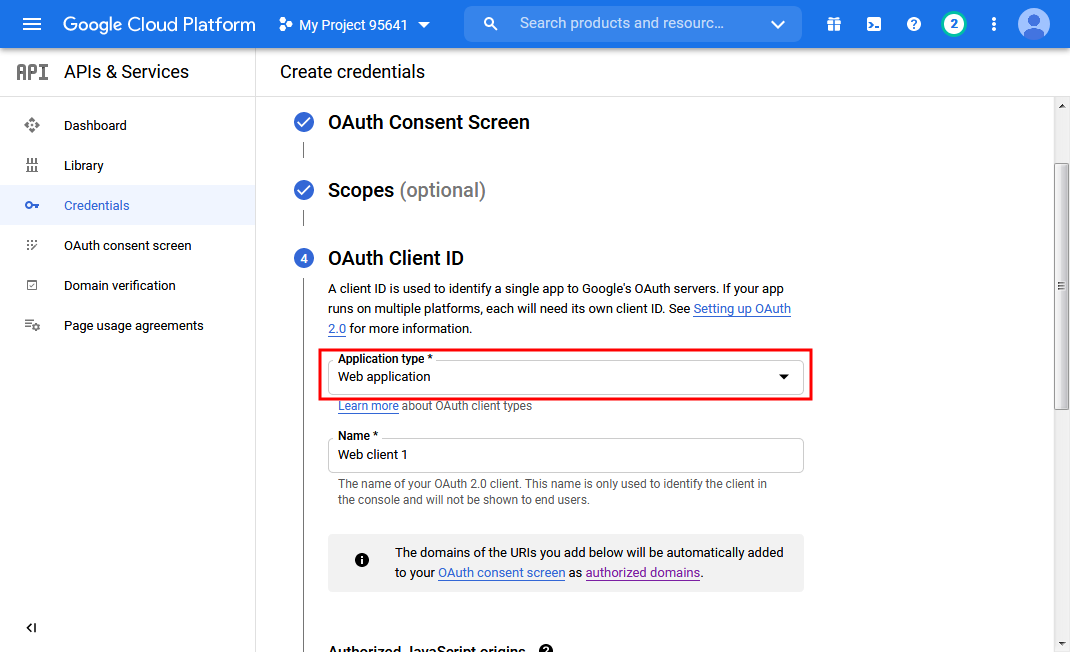
14. From the OAuth Client ID tab.
a) Select Web application as the Application type.
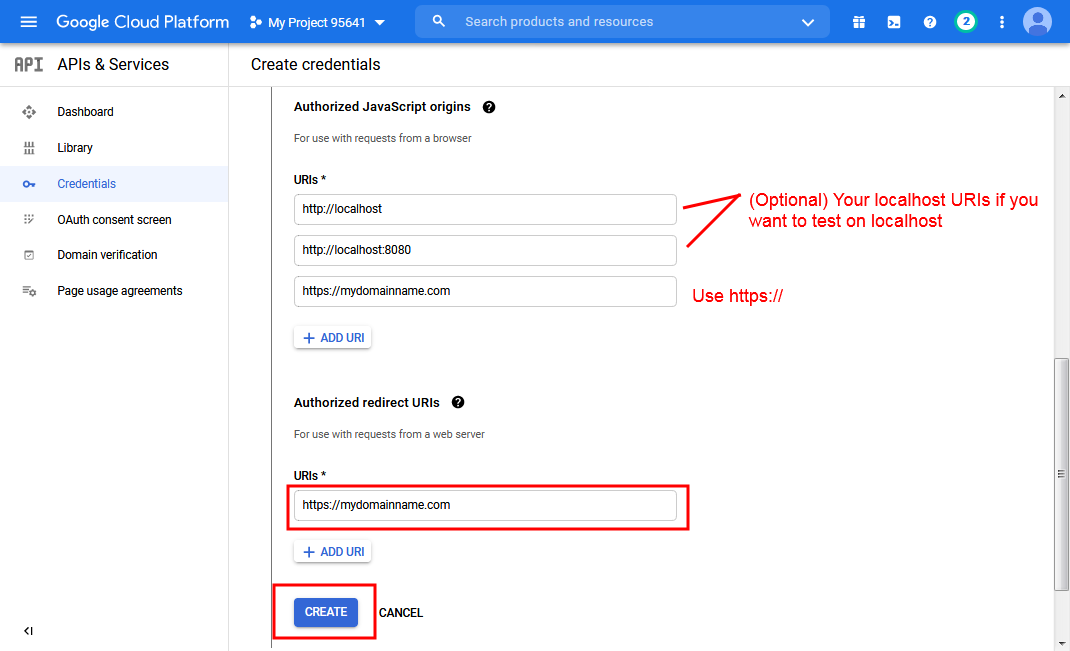
b) From the Authorized JavaScript origins and Authorized redirect URIs, click on the ADD URI buttons.
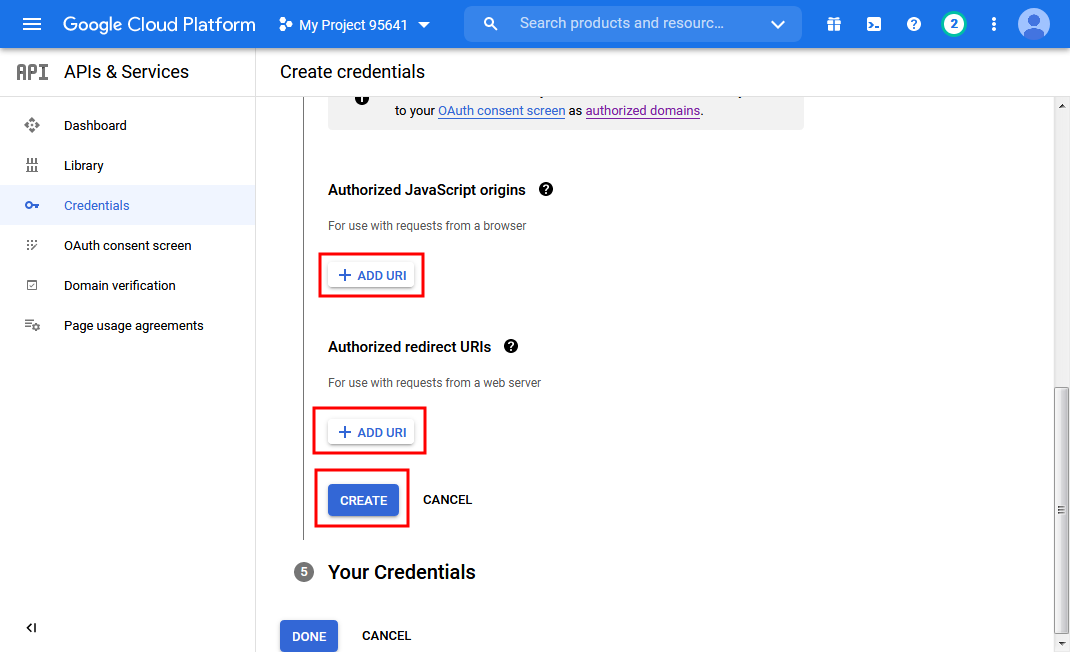
c) Add the details as shown below.
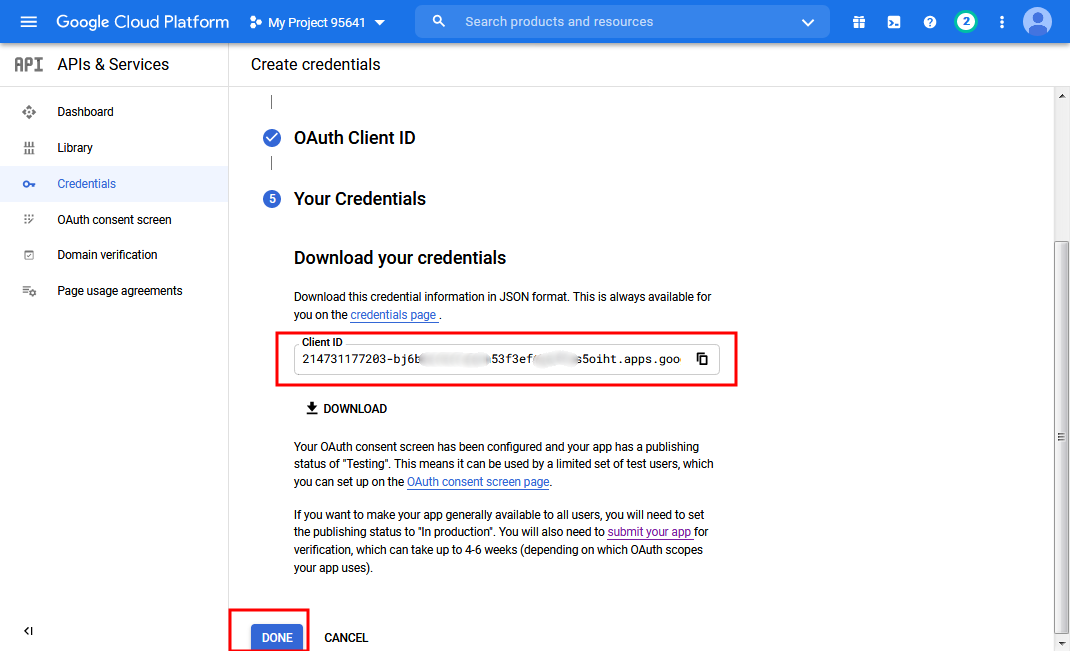
15. From the Your Credentials tab, youl will see your app’s Client ID and then click the DONE button.
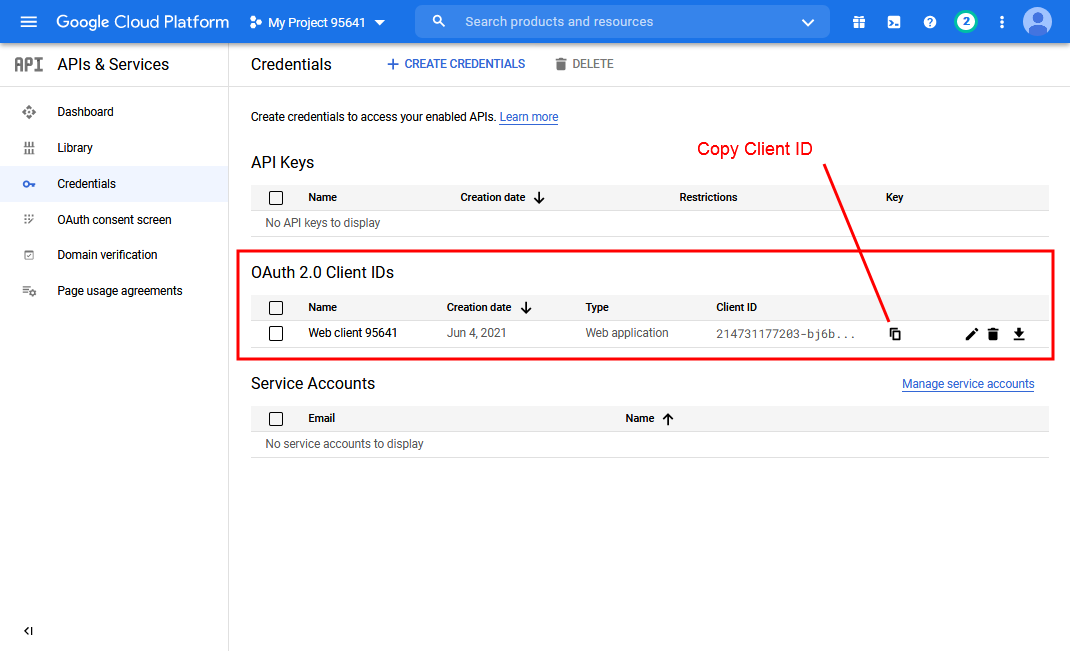
16. From the Credentials page, copy the app’s Client ID as shwon below.
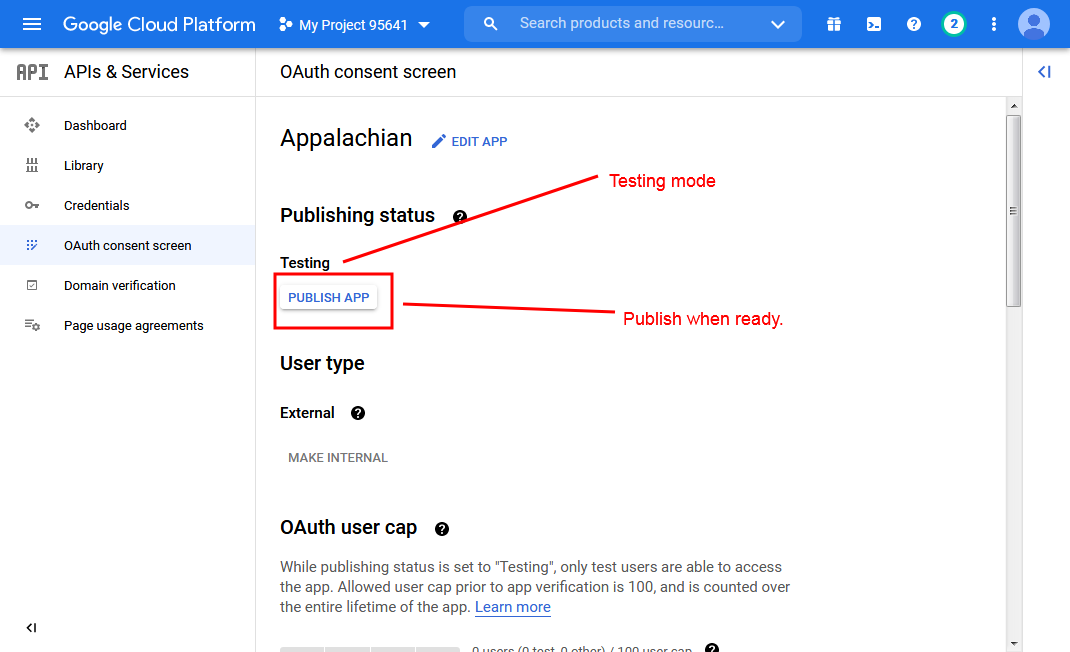
17. From the sidebar click on OAuth consent screen, choose whether to pusblih your app or leave it on testing mode.
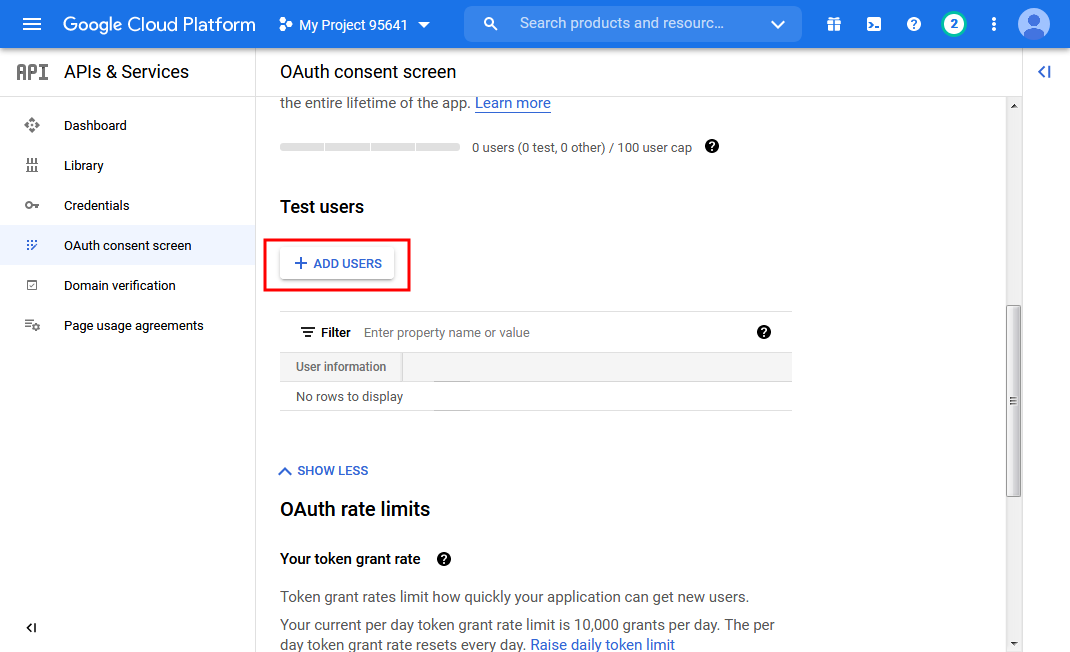
18. Enter your app’s test users’ emails.
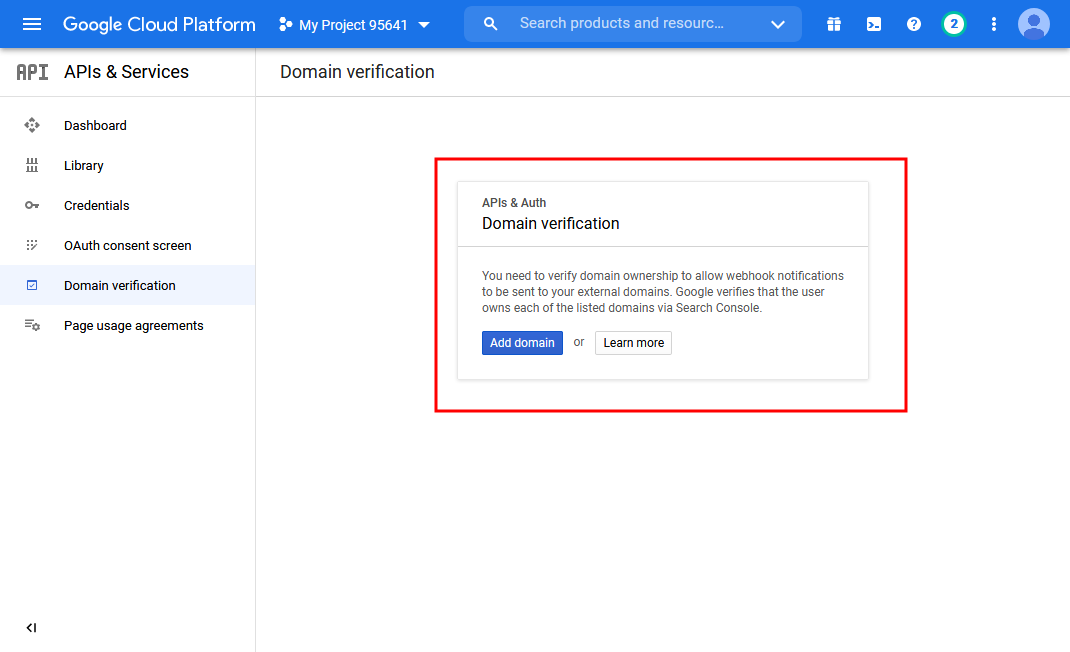
19. From the sidebar click on Domain verification, and proceed as instructed.
20. DONE.